

Learn how to integrate Mailchimp with your WordPress site without using a plugin. Follow this step-by-step tutorial to add Mailchimp forms via shortcode or widget using Mailchimp API 3.0 for easy subscription management.

You want an email signup form. You don’t want another plugin loading its own scripts and styles on every page just to POST one address to Mailchimp. Fair. Mailchimp hands you a REST API, and WordPress already gives you everything you need to call it, so let’s wire it up ourselves.
We’ll use the Mailchimp Marketing API, version 3.0, which is the current version. The whole build is a handful of functions in your theme: a shortcode for the form, an optional widget, and an AJAX handler that runs the actual subscribe on the server.
One thing up front, because it matters: your API key is a secret. It stays in your PHP, on the server, and never reaches the browser. That’s the entire reason we do the subscribe in an AJAX handler instead of posting straight from JavaScript to Mailchimp.
Step 1: Get Your API Key
Log into Mailchimp and open /account/api/. Generate a key and copy it somewhere safe. Look at the tail of the key, the bit after the dash like -us19. That’s your datacenter, and every request has to go to that specific server. The code pulls that suffix off the key for you, so you never hardcode it twice.
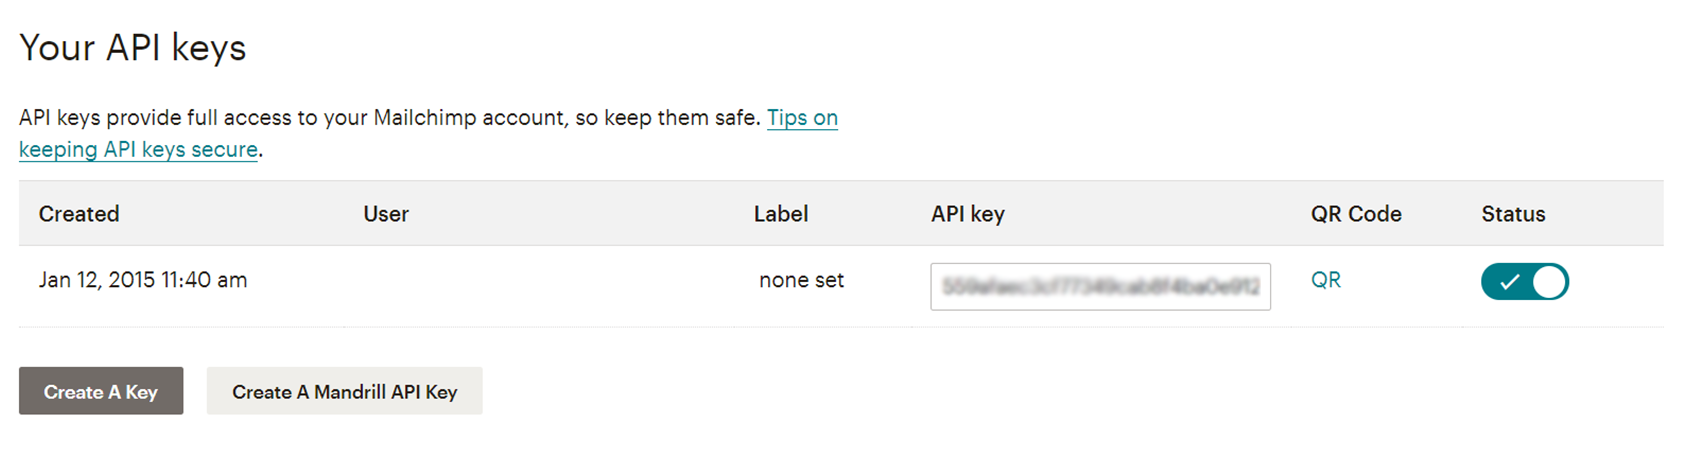
Mailchimp API Keys Section
Step 2: Create a New Audience
Mailchimp calls a list an “audience.” If you don’t already have one, create it under /lists/. Every subscriber you add through the API lands in a specific audience, so you’ll need its ID in a second.
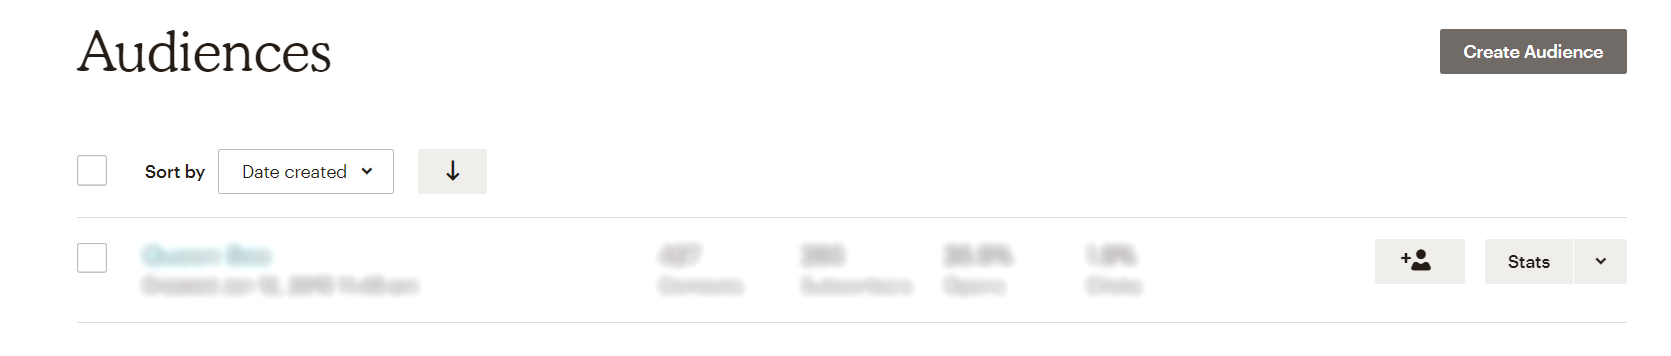
Create New Audience
Step 3: Get the Audience/List ID
Open the audience, go to Settings, and find the Audience ID. Older docs and the API itself still call it the list ID; it’s the same value. Copy it. You’ll drop it into the form so WordPress knows where new subscribers should go.
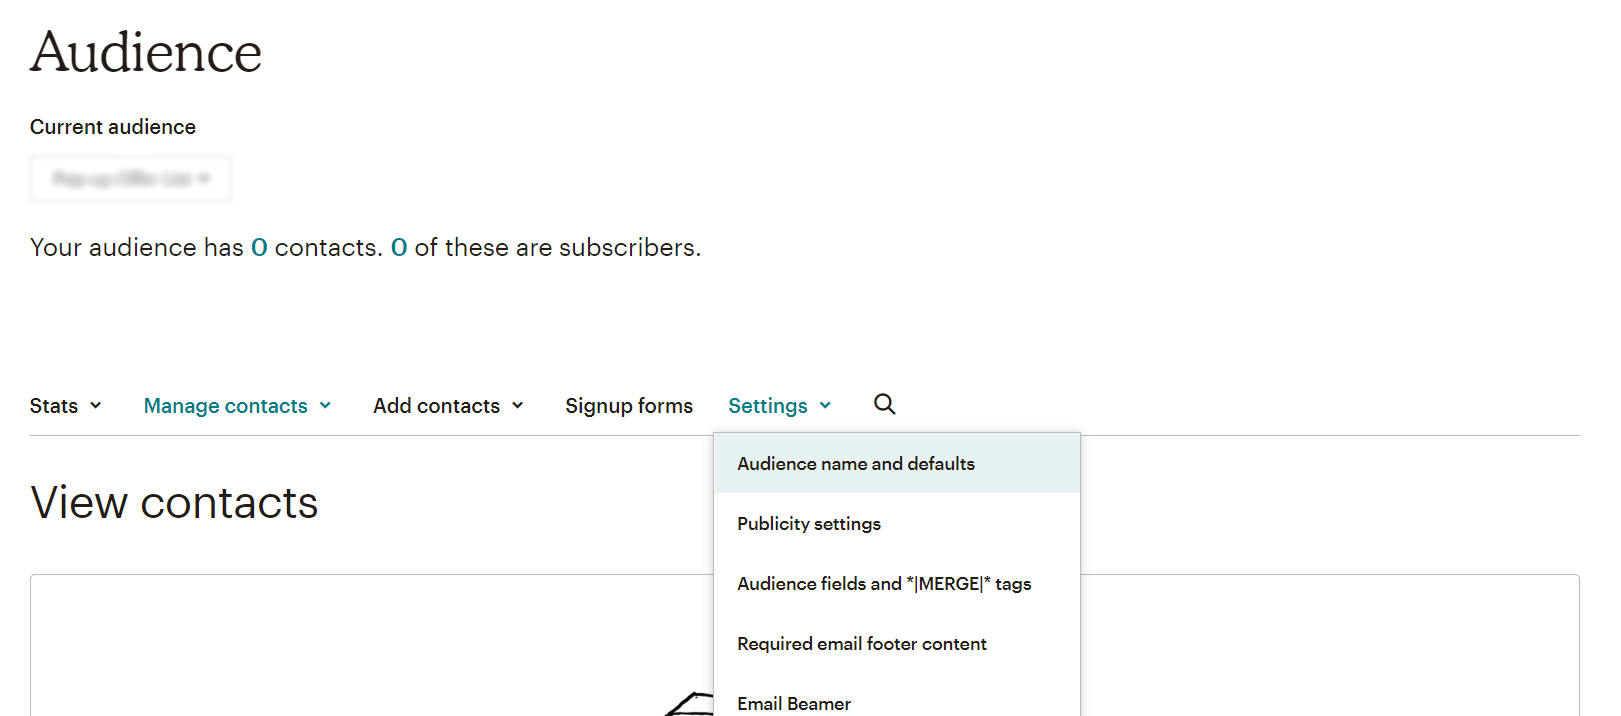
Audience Settings
Step 4: Create the Form Using Shortcode
Here’s the form. Paste this into your theme’s functions.php. It registers a [mailchimp_without_plugin_form] shortcode that prints an email field, a button, and an empty box where the response message will land.
<?php
/**
 * Mailchimp WordPress without plugin – shortcode
 */
function mailchimp_without_plugin_form( $atts ) {
    $a = shortcode_atts( array(
        'title_field' => 'Subscribe Now!',
        'invite_text' => 'We send our updates straight to your inbox',
        'button_text' => 'Subscribe',
        'list_id' => ''
    ), $atts );
    $title_field = $a['title_field'];
    $invite_text = $a['invite_text'];
    $button_text = $a['button_text'];
    $list_id = $a['list_id'];
    $form = sprintf(
        '<div class="mailchimp-without-plugin__form-wrapper">
            <form method="post" class="mailchimp-without-plugin__mainform" autocomplete="off">
                <h3 class="mailchimp-without-plugin__widget-title">%s</h3>
                <input type="email" name="email" required />
                <button type="button" id="mcwop-btn" class="mailchimp-without-plugin__widget-button">%s</button>
                <p class="mailchimp-without-plugin__widget-blurb">%s</p>
                <input type="hidden" name="list_id" value="%s" />
                <div id="mcwop-response-box"></div>
            </form>
        </div>',
        esc_html( $title_field ),
        esc_html( $button_text ),
        esc_html( $invite_text ),
        esc_attr( $list_id )
    );
    return $form;
}
add_shortcode( 'mailchimp_without_plugin_form', 'mailchimp_without_plugin_form' );
Nothing talks to Mailchimp yet. This shortcode only draws the form and stashes your list ID in a hidden field. The subscribe itself happens in Step 6.
Step 5: Create a Custom Widget
If you’d rather drop the form into a sidebar or a widget area, register a small widget that wraps the shortcode. Same idea, also into functions.php.
/**
 * Mailchimp WordPress without plugin - widget main class
 *
 * This widget allows you to display a Mailchimp subscribe form
 * without using any plugins.
 */
class Mailchimp_Without_Plugin_Form_Basic_Widget extends WP_Widget {

    /**
     * Constructor to set up the widget name and description.
     */
    public function __construct() {
        $widget_options = array(
            'classname'   => 'Mailchimp_Without_Plugin_Form_Basic_Widget',
            'description' => 'Display basic Mailchimp subscribe form.'
        );
        parent::__construct( 'Mailchimp_Without_Plugin_Form_Basic_Widget', 'Mailchimp Custom - Basic', $widget_options );
    }

    /**
     * The widget's frontend output.
     *
     * @param array $args Display arguments including 'before_title', 'after_title', 'before_widget', and 'after_widget'.
     * @param array $instance The widget instance settings.
     */
    public function widget( $args, $instance ) {
        echo do_shortcode('[mailchimp_without_plugin_form title_field="'.$instance['title_field'].'" invite_text="'.$instance['invite_text'].'" list_id="'.$instance['list_id'].'"]');
    }

    /**
     * Outputs the widget settings form in the admin area.
     *
     * @param array $instance The current widget settings.
     * @return void
     */
    public function form( $instance ) {
        $title_field = ! empty( $instance['title_field'] ) ? esc_attr( $instance['title_field'] ) : '';
        $invite_text = ! empty( $instance['invite_text'] ) ? esc_attr( $instance['invite_text'] ) : '';
        $list_id = ! empty( $instance['list_id'] ) ? esc_attr( $instance['list_id'] ) : '';

        echo '< p>';
        echo '< label for="' . esc_attr( $this->get_field_id( 'title_field' ) ) . '">' . esc_html__( 'Title:', 'mcwop' ) . '';
        echo '< input type="text" class="widefat" id="' . esc_attr( $this->get_field_id( 'title_field' ) ) . '" name="' . esc_attr( $this->get_field_name( 'title_field' ) ) . '" value="' . esc_attr( $title_field ) . '" />';
        echo '< /p>';

        echo '< p>';
        echo '< label for="' . esc_attr( $this->get_field_id( 'invite_text' ) ) . '">' . esc_html__( 'Invite Text:', 'mcwop' ) . '';
        echo '< input type="text" class="widefat" id="' . esc_attr( $this->get_field_id( 'invite_text' ) ) . '" name="' . esc_attr( $this->get_field_name( 'invite_text' ) ) . '" value="' . esc_attr( $invite_text ) . '" />';
        echo '< /p>';

        echo '< p>';
        echo '< label for="' . esc_attr( $this->get_field_id( 'list_id' ) ) . '">' . esc_html__( 'List ID:', 'mcwop' ) . '';
        echo '< input type="text" class="widefat" id="' . esc_attr( $this->get_field_id( 'list_id' ) ) . '" name="' . esc_attr( $this->get_field_name( 'list_id' ) ) . '" value="' . esc_attr( $list_id ) . '" />';
        echo '< /p>';
    }

    /**
     * Updates the widget settings.
     *
     * @param array $new_instance The new settings for the widget instance.
     * @param array $old_instance The previous settings for the widget instance.
     * @return array The updated widget instance.
     */
    public function update( $new_instance, $old_instance ) {
        $instance                = $old_instance;
        $instance['title_field'] = $new_instance['title_field'];
        $instance['invite_text'] = $new_instance['invite_text'];
        $instance['list_id']     = $new_instance['list_id'];
        return $instance;
    }
}

/**
 * Registers the Mailchimp widget.
 *
 * @return void
 */
function Mailchimp_Without_Plugin_Form_Basic_Widget_Register() {
    register_widget( 'Mailchimp_Without_Plugin_Form_Basic_Widget' );
}
add_action( 'widgets_init', 'Mailchimp_Without_Plugin_Form_Basic_Widget_Register' );
Step 6: Handling Form Submission via AJAX
This is where the actual subscribe happens, and where your API key lives. Add this to functions.php and paste your key into the $api_key line.
<?php
/**
 * Mailchimp WordPress without plugin – ajax handler
 */
function mailchimp_without_plugin_submission() {
    $response = array();
    $email    = $_POST['email'];
    $list_id  = $_POST['list_id'];
    $api_key  = 'Insert Your Mailchimp API Key Here';
    if ( empty( $email ) || filter_var( $email, FILTER_VALIDATE_EMAIL ) === false ) {
        $response['message'] = '<p class="mcwop-alert-danger">Please enter a valid email address.</p>';
        echo json_encode( $response );
        exit;
    }
    $member_id        = md5( strtolower( $email ) );
    $mailchimp_server = substr( $api_key, strpos( $api_key, '-' ) + 1 );
    $url              = 'https://' . $mailchimp_server . '.api.mailchimp.com/3.0/lists/' . $list_id . '/members/' . $member_id;
    $json = json_encode([
        'email_address' => $email,
        'status'        => 'subscribed'
    ]);
    $ch = curl_init( $url );
    curl_setopt( $ch, CURLOPT_USERPWD, 'user:' . $api_key );
    curl_setopt( $ch, CURLOPT_HTTPHEADER, ['Content-Type: application/json'] );
    curl_setopt( $ch, CURLOPT_RETURNTRANSFER, true );
    curl_setopt( $ch, CURLOPT_TIMEOUT, 10 );
    curl_setopt( $ch, CURLOPT_CUSTOMREQUEST, 'PUT' );
    curl_setopt( $ch, CURLOPT_SSL_VERIFYPEER, false );
    curl_setopt( $ch, CURLOPT_POSTFIELDS, $json );
    $result   = curl_exec( $ch );
    $httpCode = curl_getinfo( $ch, CURLINFO_HTTP_CODE );
    curl_close( $ch );
    if ( $httpCode == 200 ) {
        $response['status']  = 200;
        $response['message'] = '<p class="mcwop-alert-success">You have successfully subscribed!</p>';
    } else {
        switch ( $httpCode ) {
            case 214:
                $mailchimp_error_message = 'You are already subscribed.';
                break;
            default:
                $mailchimp_error_message = 'Some problem occurred, please try again.';
                break;
        }
        $response['message'] = '<p class="mcwop-alert-warning">' . $mailchimp_error_message . '</p>';
    }
    echo json_encode( $response );
    exit;
}
add_action( 'wp_ajax_mailchimp_without_plugin_submission', 'mailchimp_without_plugin_submission' );
add_action( 'wp_ajax_nopriv_mailchimp_without_plugin_submission', 'mailchimp_without_plugin_submission' );
A few things worth understanding here:
- The URL is built from that datacenter suffix and hits
lists/{list_id}/members/{subscriber_hash}. The hash is the MD5 of the lowercased email, which is how the API v3.0 addresses one member. UsingPUTmeans “add or update,” so a repeat signup won’t blow up. - Auth is HTTP Basic: any username, your API key as the password. The literal
user:in the code is that throwaway username. Mailchimp only checks the key. - Because the key sits here in server-side PHP, it never reaches the visitor’s browser. Keep it that way. Never echo it into JavaScript or a data attribute.
Two honest flags so you ship this with your eyes open. CURLOPT_SSL_VERIFYPEER is set to false, which turns off TLS certificate checking. That’s a convenience on a broken local box and a bad habit on a live site, so set it back to true in production. And the 214 branch for “already subscribed” won’t actually fire: Mailchimp returns 400 with a “Member Exists” title for a duplicate, not 214, so duplicates fall through to the generic error. Harmless, but don’t rely on that message.
One more for a real site: add a nonce. This handler runs for logged-out visitors through wp_ajax_nopriv and does no nonce check, so anyone who finds the endpoint can hit it. Fine for a low-stakes newsletter box, worth tightening if you care.
Step 7: Adding CSS and JavaScript for the Form
Last, a little CSS to make the form presentable. This is plain stylesheet, so it belongs in your theme’s stylesheet rather than functions.php, whatever the code label below says.
<?php
/* Mailchimp WordPress without plugin – main css */
.mailchimp-without-plugin__form-wrapper { margin-bottom: 40px; }
#mcwop-btn { border: 1px solid #fff852; background: #fff852; height: 31px; padding: 0 10px; line-height: 1; }
.mcwop-alert-danger, .mcwop-alert-success, .mcwop-alert-warning { font-size: 13px; margin-top: 10px; }
.mcwop-alert-danger { color: #ff0000; }
.mcwop-alert-warning { color: #ffa500; }
.mcwop-alert-success { color: #007f00; }
.mailchimp-without-plugin__mainform input[type="email"] { padding-left: 10px; padding-right: 10px; box-sizing: border-box; max-width: 160px; }
.mailchimp-without-plugin__widget-blurb { margin-top: 10px; font-size: 13px; }
JavaScript for AJAX Form Submission:
And the JavaScript that catches the button click, posts to WordPress’s admin-ajax.php, and drops the response back into the form. It reads mcwop_form_submission_params.ajaxurl, so enqueue this script and hand it that value with wp_localize_script.
<?php
/* Mailchimp WordPress without plugin – main javascript */
jQuery(document).ready(function(){
    jQuery('#mcwop-btn').on('click', function(e){
        e.preventDefault();
        var button = jQuery(this);
        var dataPosts = {
            'action' : 'mailchimp_without_plugin_submission',
            'email' : jQuery('.mailchimp-without-plugin__mainform input[name="email"]').val(),
            'list_id' : jQuery('.mailchimp-without-plugin__mainform input[name="list_id"]').val()
        };
        jQuery.ajax({
            url : mcwop_form_submission_params.ajaxurl,
            data : dataPosts,
            dataType: "text",
            type : 'POST',
            beforeSend : function () {
                button.text('Processing').attr('disabled', 'disabled');
                jQuery('#mcwop-response-box').text('');
            },
            success : function(data){
                var json = jQuery.parseJSON(data);
                jQuery('#mcwop-response-box').append(json.message);
                jQuery('.mailchimp-without-plugin__mainform input[name="email"]').val('');
                button.text('Subscribe').removeAttr('disabled');
            }
        });
    });
});
Wrapping Up
That’s a working Mailchimp signup with zero plugins: a shortcode, an optional widget, and one server-side handler. You own the markup, the styles, and the request, and nothing loads on your pages except code you wrote. Clean up the two caveats above before you point it at a live audience and you’re good.
nice!
thank you 🙂
Estimados!
Hemos analizado dopethemes.com el 27-Oct-20 y le hemos generado un estudio SEO gratis en este link: https://seo.creapublicidadonline.com/domain/dopethemes.com
Nos consideramos profesionales en posicionamiento web
Encantados de saludarlo